
Curving a wall can be done at any time, however it may be advisable to do it at the beginning as you will be making changes to the floor plan. If you are working with an Innoplus version older than 12.0.2120, editing the floor plan will lose any tiles, windows or doors you may have added in.
Ensure you have 2D mode selected.
- Draw your room shape, with straight walls.
- Go to 2D mode and click the floor in the View picker in the bottom right for a birds eye view.
- Delete the straight wall that you would like to be curved by selecting it and hit delete on your keyboard.
- Once you have deleted the wall, update the View picker by clicking it again.
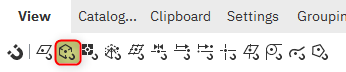
- Select Wall sequence (found in the Build tab):
- Before selecting a snapping point to draw the curved wall, you will need to check your wall thickness and height.
Note: This needs to match all your other walls. - Select where the curved wall will come from the cursor on the Opposite wall: Left, Right or centred.
This determines the position of the snapping point on the new wall.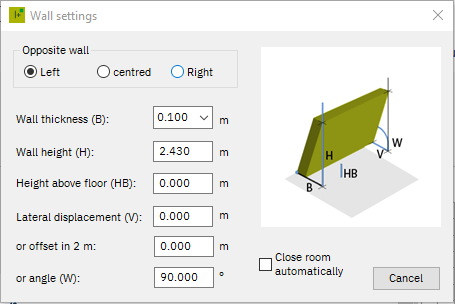
- Check that the sloping ceiling settings (Lateral displacement, Offset in 2 m)are set to 0.
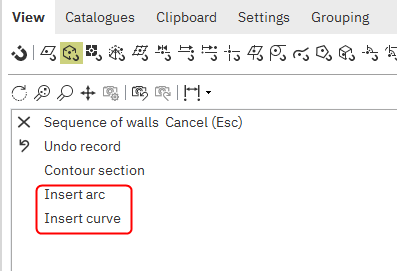
- Select the corner point snapping tool, under the View tab in the Assistant box. Left click once on the plan where you want the curved wall to start.
- Select insert arc or insert curve depending on the shape needed.
- Left-click on the plan where the wall should end.
- The cursor will now change into a drawing tool.
- Drag the curve where you want it to be.
- Left-click once on the plan.
- Select Finished! on the View tab on right-hand side.
- Refresh your plan by clicking the View picker in the bottom right of your screen.
- You will now have a curved wall and a complete floor.
Related articles
How to round or bevel the corner of an internal wall
How to change the size of a room in an existing plan
How to add a sloping ceiling after drawing the room